Your first personal website with ttrek

A personal website gives your writing a home: a short introduction, a journal
for new ideas, and a notebook for things you want to find again. You do not have
to build all of that before writing your first sentence. example-personal-site
provides a working starting point that you can copy and make your own.
This is the simplest website example to start with. You edit ordinary Markdown files on your computer, then read the result in your browser. There are no user accounts to create and no site database to set up. For accounts and discussions, try the community example.
Follow the steps below to copy the example, make it yours, and run it on your computer. At the end, you will prepare your AWS credentials for deployment.
1. Get your tools ready
You need a terminal, a text editor, a browser, and ttrek. Follow Getting started to install ttrek and the build tools. An internet connection is needed to download packages; some dependencies compile from source, so the first installation takes longer.
2. Clone the example
Open a terminal in the folder where you keep your projects:
ttrek clone example-personal-site -outdir my-personal-site
cd my-personal-site
Think of clone as taking home a copy of a recipe book: the example's files
become your files to change. -outdir names the folder to create; choose a new
or empty folder.
Your copy includes the pages, design, and a ttrek.json file listing the packages
the website needs. Next, you will install those packages and start the site.
3. Install and run locally
From my-personal-site, run:
ttrek install -y
ttrek run -script start
install reads the dependency list and puts the packages in the project's
ttrek-venv folder. -y accepts the installation plan. The start command runs
start.sh to bring up your website.
Open http://localhost:8080 and leave the terminal running. localhost means
“this computer.” 8080 is the port: the numbered door where this server listens.
No AWS account or keys are needed for local work.
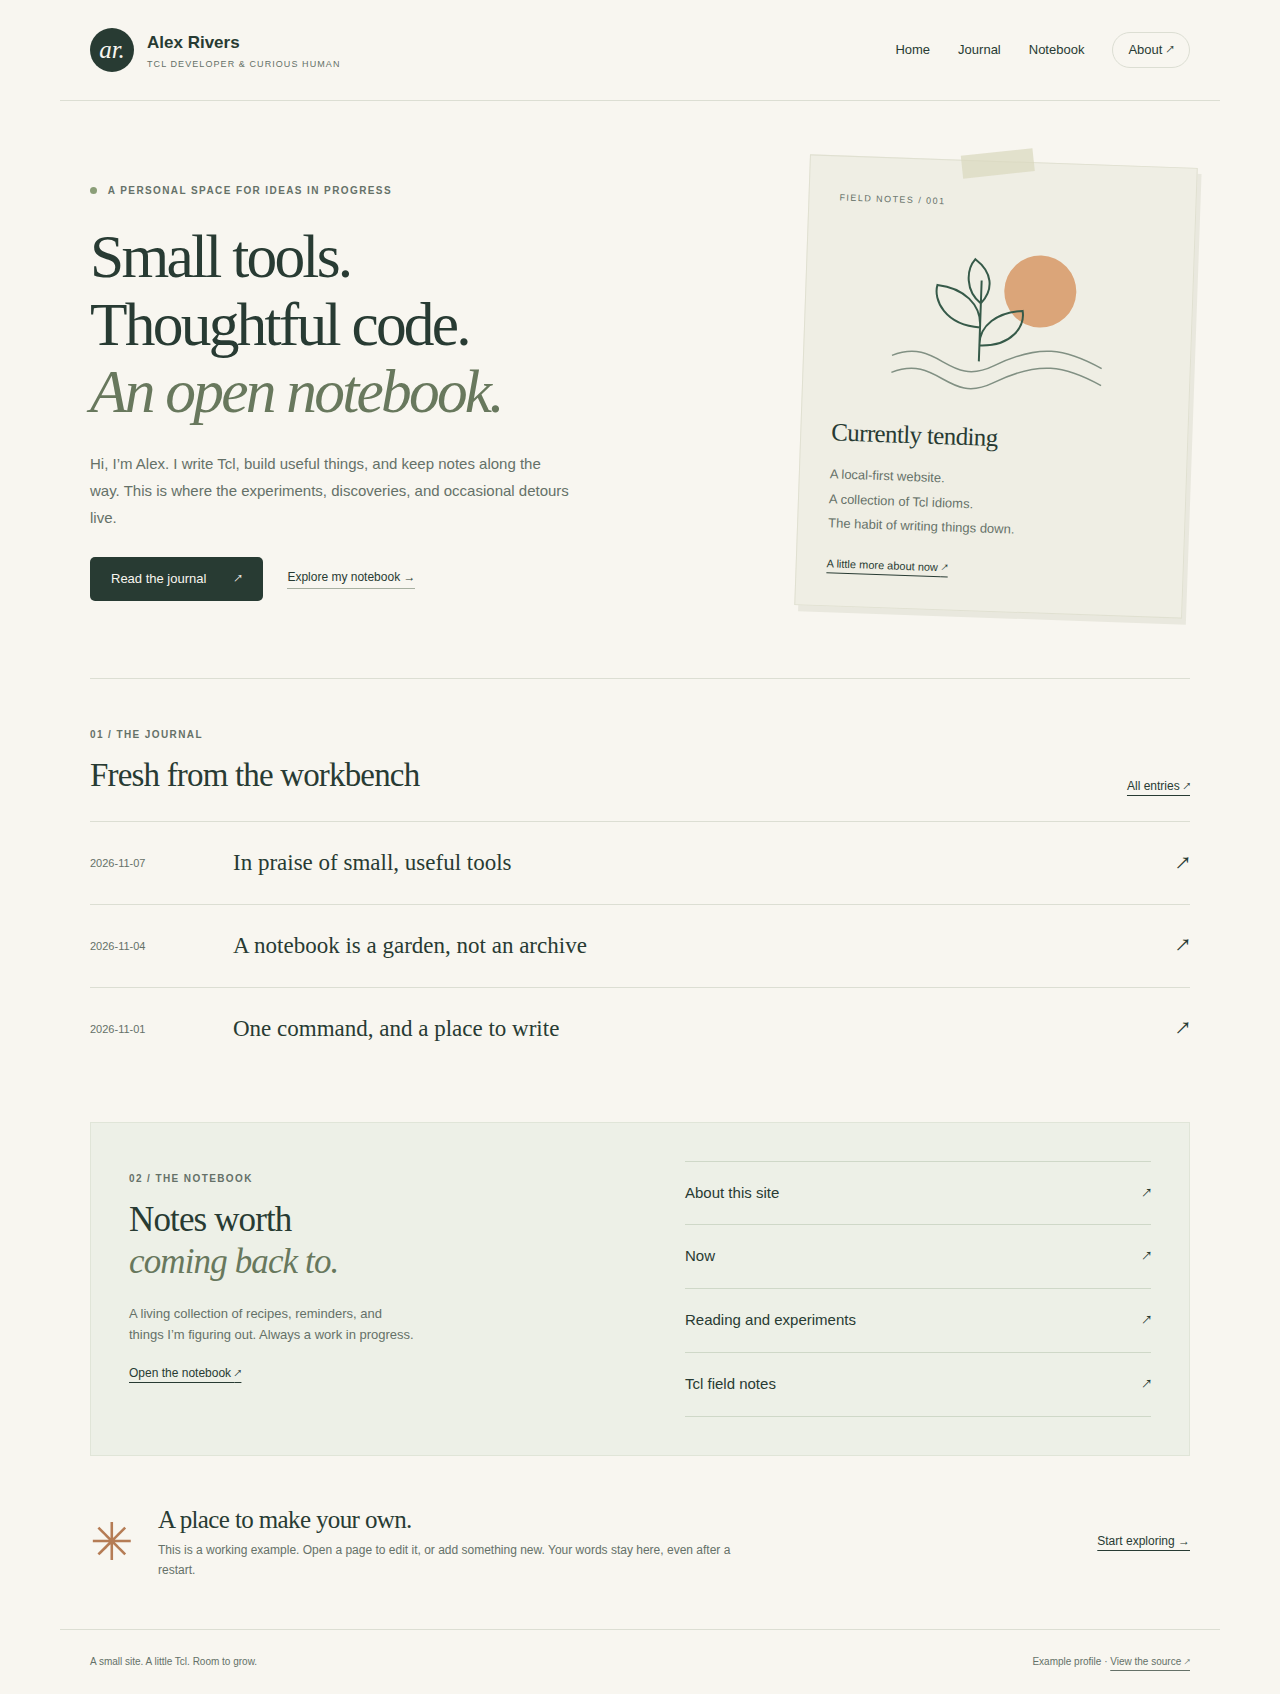
The sample profile belongs to fictional developer Alex Rivers. Make it your own in the next steps.
Use Ctrl-C in the terminal to stop the server. Start it again with the same command. If another program uses port 8080, choose a different one:
ttrek run -script start -- --port 8090
Then open http://localhost:8090. The -- separates ttrek's options from the
options passed to the example.
4. Understand the few files that matter
| File or folder | Think of it as | What to change |
|---|---|---|
content/wiki/ |
Your notebook | About, projects, reading lists, and useful notes |
content/blog/ |
Your dated journal | Posts about things you build or learn |
content/images/ |
Your picture drawer | Images shared by notebook pages and journal posts |
assets/home.html.jinja |
Your front door | The homepage introduction |
assets/page.html.jinja |
A frame around every page | Your name, monogram, navigation, and footer |
assets/site.css |
The paint and spacing | Colors, fonts, and layout details |
ttrek.json |
A list of building blocks | Dependencies and the start script |
You write the content in your editor, and visitors read it on the website.
web-static-wiki handles the notebook and web-static-blog handles the journal.
A Tcl server brings the pages to your browser.
You write Markdown, a plain text format. A line starting with # is a heading,
**words** makes words bold, and lines beginning with - form a list. The
packages turn that text into the HTML your browser displays.
5. Make the homepage yours
Open assets/home.html.jinja in your editor and find “Hi, I’m Alex.” Replace
that paragraph with a short introduction: who you are, what you make, and what
a reader can find here. In assets/page.html.jinja, replace Alex Rivers and
ar. with your name and initials. Keep the template expressions such as
{{ title }}: they insert the title of the page being displayed.
Stop and restart the server, then refresh the browser. Try one small change at
a time so you can see what it does. To change the palette next, open
assets/site.css and look at --paper, --ink, and --quiet near the top.
6. Write a notebook page
Create content/wiki/my-first-page.md in your editor and save:
# My first page

Hello from my new website!

This is my **first notebook page**.

- Write an idea
- Save it
- Come back tomorrow
Restart the server. Click Notebook to find the new page, or open http://localhost:8080/wiki/my-first-page directly.
The filename chooses the address. my-first-page.md becomes
/wiki/my-first-page. The first heading chooses the displayed title. You can
change the heading without breaking the address. Renaming the file changes
the address, so update links if you do that.
Folders work too: content/wiki/projects/weather-tool.md becomes
/wiki/projects/weather-tool. The notebook lists folders and pages for you.
7. Add a journal entry
Create content/blog/2026-11-15-hello.md:
# A small beginning

Today I gave my writing a home.

## What I learned

A website can start with a few text files and a working example.

## What comes next

I will add a short page about the project I am building.
Use a real date in YYYY-MM-DD form, followed by a dash and a short filename.
The date sorts the journal, newest first. This file appears at
/blog/2026-11-15-hello; recent posts also appear on the homepage.
Future dates do not schedule publication: every included post is visible.
Keep unfinished drafts outside content/ until you want them to appear.
After saving, stop and restart the server, then refresh. The server reads a copy of your Markdown at startup, much like opening a book at the beginning of a reading session. Saving a file changes the book on disk; restarting opens the updated copy. Refreshing the browser alone does not reload the files.
The same rule applies to deletion. Remove a Markdown file, restart, and its page
and listing disappear. Keep copies or use version control for writing you might
want to recover. Back up the project files, not just the generated ttrek-venv
folder: dependencies can be installed again, but your writing is yours to keep.
Add a picture
Copy a picture into content/images/, for example photo.jpg. Add this to a
notebook page or journal post:

Restart the site and refresh the page. The words in square brackets describe the picture for readers who cannot see it. The filename in parentheses chooses the file in your image folder. The site supplies its browser address automatically, so the same reference works on every page, including pages in subfolders.
For a folder such as content/images/projects/, use projects/photo.jpg.
PNG, JPEG, WebP, GIF and SVG work, along with AVIF, ICO and BMP. Keep each image
under 20 MiB. Images are served by your local website; no cloud setup is needed.
8. Prepare your AWS access key pair
Your site is now running locally. To prepare for AWS deployment, use an
access key ID and secret access key belonging to the intended deployment
identity. These identify who is making AWS requests; the identity's permissions
determine what those requests may do. Keep the keys outside your project and
never put them in Markdown, templates, ttrek.json, or Git.
Install the AWS CLI using Amazon's instructions, then confirm it is available:
aws --version
Create a named profile so this site's credentials are easy to select:
aws configure --profile personal-site
At the prompts, enter your access key ID, secret access key, intended AWS region,
and json as the output format. AWS stores the profile in your home directory's
.aws files. These are separate from the site. See
AWS configuration and credential files.
Temporary credentials also need their session token.
Check which account and identity the profile uses:
aws sts get-caller-identity --profile personal-site
Check the returned Account and Arn against the intended deployment identity.
This verifies the identity, not its permission to deploy a stack. The command
creates no website resources. See GetCallerIdentity.
9. Put your website online
The next installment will walk through deploying to AWS, opening your public website, and publishing changes. For now, your site runs on your computer and your AWS profile is ready for the deployment steps.
If something gets stuck
| What you see | What to try |
|---|---|
| The destination is not empty | Choose a different -outdir name or an empty directory. |
| A missing build tool | Install the named tool, then rerun ttrek install -y. |
| The browser cannot connect | Keep the start command running and open the exact local URL it prints. |
| Your changes do not appear | Save, stop, restart, and refresh. Confirm you edited the content directory printed at startup. |
| A journal file is rejected | Give it a real date followed by a dash, for example 2026-11-15-hello.md. |
| AWS reports invalid credentials | Check the named profile and whether the keys or temporary session have expired. |